How to Fix Overexposed Photos Captured in Harsh Midday Sunlight | Rescue Your Highlights & Master Dramatic Lighting
TL;DR: Harsh midday sun creates the toughest lighting conditions—deep shadows, blown-out highlights, and washed-out colors. But you don’t have to delete those photos. Using simple editing techniques like highlight recovery, shadow lifting, and selective adjustments, you can transform harshly lit images into dramatic, professional-looking shots. This guide shows you exactly how to fix overexposed photos step by step, whether you’re using a phone or computer.
Key Takeaways
- Harsh light isn’t always bad—it creates opportunities for bold, high-contrast images .
- Start with highlight recovery before adjusting anything else to save blown-out areas .
- Use masks and selective tools to fix specific problem areas without ruining the whole photo .
- Embrace the contrast rather than fighting it—cinematic images often use strong light/shadow patterns .
- Shoot in RAW format whenever possible for maximum editing flexibility .
One sentence intro: You stepped outside at noon, saw a great scene, snapped the photo, and now your subject looks like a ghost washed out by the brutal overhead sun.
Briefly answer the topic: To fix overexposed photos taken in harsh midday sunlight, you need to lower highlights, recover detail in bright areas, lift shadows just enough to see detail, and use selective editing to balance the extreme contrast—turning that harsh light from a mistake into a stylistic choice .
Understanding the Midday Sun Problem
Midday sun is the toughest light in photography. It comes from directly overhead, creating harsh shadows under eyes and noses while blasting the top of your subject with intense brightness . This happens because the sun is at its highest point, and there’s no atmosphere to soften the light.
The result? Photos with two problems at once: areas that are pure white with no detail, and shadows so dark you can’t see what’s there. Your camera simply can’t capture the full range of brightness our eyes can see.
But here’s the mindset shift: cinematographers don’t always avoid harsh light. They use it. Think of movies set in deserts, or dramatic scenes where characters walk through harsh sunlight. The key is controlling that light, not eliminating it .
Before You Edit: Quick Fixes to Try Right Now
Did You Check If Your Phone Can Fix This Itself?
Before downloading any apps, try what’s already in your pocket. Most modern phones have surprisingly capable editing tools built right into the Photos app .
For iPhone users:
Open your photo, tap Edit, then look for the dial icon. Drag down the Exposure and Highlights sliders first. These target the brightest parts of your image. Then increase Shadows slightly to bring back detail in dark areas. Finally, add a touch of Contrast to restore depth .
For Android users:
The process is similar. Find the Edit button, look for “Brightness” or “Exposure” controls, and lower them. Then find “Highlights” and drag left. Most Android galleries also have “Shadows” or “Black levels” you can adjust.
The beauty of built-in editors? They’re free, fast, and already on your phone. The downside? They can’t fix severely blown-out photos as well as specialized apps .
Table: Quick Editing Guide for Midday Sun Problems
| Problem You See | What’s Happening | The Fix | Best Tool |
|---|---|---|---|
| White sky, no clouds | Highlights are completely blown out | Lower Highlights, then reduce Whites | Exposure/Highlights sliders |
| Face is too bright | Direct sun on skin tones | Use selective brush to darken face only | Masking tools |
| Dark shadows under eyes | Overhead light creates raccoon eyes | Lift Shadows slider, but don’t overdo it | Shadows slider |
| Whole photo looks flat | Too much light kills contrast | Increase Contrast and use Tone Curve | Contrast/Tone Curve |
| Colors look washed out | Bright sun bleaches color | Add Vibrance and Saturation carefully | Vibrance/Saturation |
| Edges distracting | Background pulls focus | Darken corners with vignette | Vignette tool |
Section 1: The Foundation—Global Adjustments First
Before you start painting on your photo or using fancy masks, you need to fix the whole image. Think of this as laying the foundation before decorating a room.
Why Does My Histogram Look Like Two Mountains?
Open your editing app and look for the histogram—that graph that shows brightness levels. In a harsh midday photo, you’ll often see two peaks: one on the far right (bright highlights) and one on the far left (dark shadows), with a dip in the middle. This is the signature of harsh light .
Step 1: Kill the Highlights
Find the Highlights slider and drag it left. Watch the brightest parts of your image—the sky, white clothing, shiny surfaces. You should see texture reappearing. Pull until the highlights have detail but still look bright. Don’t make them gray .
Step 2: Tame the Whites
Right below Highlights, you’ll usually find Whites. This slider controls the very brightest points. Hold down Alt/Option (on computer) while dragging, and you’ll see a black screen with white spots. Those white spots are areas losing detail. Drag left until most spots disappear .
Step 3: Lift the Shadows
Now drag the Shadows slider right. This brings detail out of those dark areas under hats, in eye sockets, and in shadowed backgrounds. Be careful—lifting shadows too much makes photos look flat and fake .
“The trick is to make these adjustments gradually—overdoing them can create a flat, unnatural look.”
Section 2: Selective Editing—Fix Specific Areas
Global adjustments fixed the big problems. But harsh light doesn’t hit everything evenly. Now we need to target specific areas.
Can I Fix Just My Subject’s Face Without Darkening the Whole Photo?
Yes, and this is where professional editing happens. Most good apps have selective tools—brushes, masks, or radial filters that let you edit one part of the image .
In Lightroom (mobile or desktop):
- Tap the Mask icon (it looks like a circle with a dotted rectangle).
- Choose Brush or Radial Gradient.
- Paint over your subject’s face (or any too-bright area).
- Once selected, lower Exposure and Highlights just for that area.
- Maybe add a touch of Clarity to bring back skin texture .
In Snapseed (free mobile app):
- Tap Tools, then Selective.
- Tap where you want to adjust—a dot appears.
- Pinch to expand or shrink the affected area.
- Slide up/down to choose what to adjust (Brightness, Contrast, etc.), then slide left/right to change it .
Why this works: You’re fixing the problem without affecting the rest of the image. The sky stays blue, the background stays properly exposed, and your subject’s face is no longer a white blob .
What About That Completely Blown-Out Sky?
If the sky is pure white with no blue pixels at all, you have three choices :
Choice 1: The Gradient Fix
Use a Graduated Filter (linear gradient) from the top down. Darken the exposure, add some blue or teal, and increase contrast. Even without clouds, this creates the illusion of sky .
Choice 2: Go Black and White
Convert the whole image to monochrome. A white sky in black and white looks intentional—like high-key fine art photography. The harsh contrast becomes a feature, not a bug .
Choice 3: Replace It (Advanced)
In Photoshop or apps with sky replacement, you can swap in a new sky. But use this carefully—it’s easy to make photos look fake .
Section 3: Advanced Techniques for Drama and Depth
Now your exposure is balanced. Time to make it look like art.
How Do Movie Makers Get That Rich, Contrasty Look?
Cinematic images have deep blacks and bright whites, but they don’t lose detail in either. The secret is the Tone Curve .
Creating an S-Curve:
- Find the Tone Curve tool (in almost every app).
- You’ll see a diagonal line from bottom-left to top-right.
- Click the bottom-left area and drag down slightly. This deepens blacks.
- Click the top-right area and drag up slightly. This brightens whites.
- The line now has a subtle “S” shape.
This simple adjustment adds pop without looking over-processed. It mimics how film handles contrast .
Should I Add Grain to My Harsh Light Photos?
Yes—but carefully. Digital photos from midday sun can look too clean and clinical. Film grain adds texture and unifies the image .
Add a tiny amount of Grain or Noise to the whole image. You want to see it when you zoom in, but not notice it from arm’s length. This softens the digital harshness and adds a organic feel.
What About Color? Everything Looks Washed Out
Harsh sun drains color. Here’s how to bring it back naturally :
Step 1: Fix White Balance
Midday sun is usually neutral, but shadows can be blue. Use the Temperature slider to warm up skin tones slightly. If shadows look too blue, add a touch of warmth there too.
Step 2: Add Vibrance, Not Saturation
Vibrance intelligently boosts muted colors without making skin tones look orange or skies look cartoonish. Saturation boosts everything equally and can look fake. Use Vibrance .
Step 3: Target Specific Colors
In advanced apps, use HSL or Color Mixer:
- Blues: Slightly darker and more cyan looks cinematic.
- Greens: Less yellow, more natural.
- Skin tones: Warmer and slightly more orange.
Section 4: App-by-App Walkthroughs
Not everyone uses the same software. Here are specific steps for popular tools.
Using Lightroom (Free and Paid Versions)
Lightroom is the industry standard for a reason. Here’s your midday sun workflow :
- Import your photo and go to the Edit panel.
- Basic adjustments:
- Exposure: Lower by 0.3–0.7 stops
- Highlights: -50 to -80
- Shadows: +30 to +50
- Whites: Slightly reduce
- Blacks: Slightly increase
- Tone Curve: Create that subtle S-curve.
- Color: Adjust White Balance, add Vibrance.
- Masking: Use Radial Filters or Brushes on the subject.
- Effects: Add slight Dehaze (10-20) and Vignette (-10).
- Detail: Add subtle Grain.
Pro tip: In Lightroom, hold Alt while dragging Highlights, Shadows, Whites, or Blacks to see exactly where you’re losing detail .
Using Snapseed (100% Free, Mobile)
Snapseed by Google is arguably the best free mobile editor :
- Open photo in Snapseed.
- Tap Tools, then Tune Image.
- Swipe up/down to select:
- Brightness: Lower
- Highlights: Lower significantly
- Shadows: Increase slightly
- Contrast: Increase
- Saturation: Add if needed
- Tap Tools, then Selective for face adjustments.
- Tap Tools, then Vignette to darken edges.
- Tap Export to save.
Using Canva (Web and Mobile)
Canva isn’t just for design—it’s a capable photo editor :
- Upload photo to Canva.
- Click Edit Image.
- Use Brightness and Contrast sliders.
- Try Auto Adjust for a quick fix.
- Use Filters sparingly—many are too strong.
- Download when satisfied.
Section 5: Prevention—Shooting Smarter in Harsh Light
The best edit starts with a better photo. Here’s how to make midday sun work for you next time.
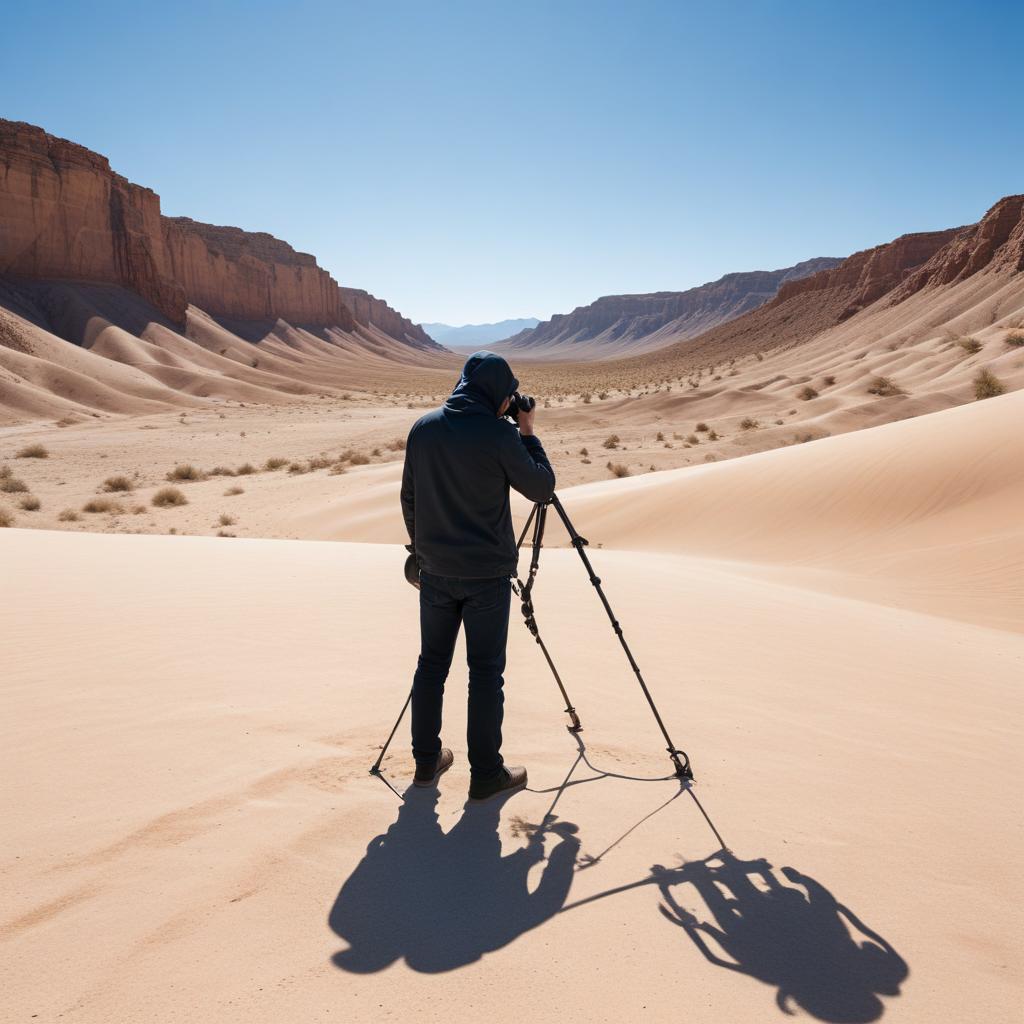
Can I Actually Take Good Photos at Noon?
Absolutely. Professional photographers don’t hide from midday sun—they use it strategically .
Find Open Shade
Position your subject under a tree, building overhang, or anywhere the sun isn’t directly hitting them. This creates soft, even light while keeping the background bright. It’s the easiest fix .
Use a Reflector
A $20 collapsible reflector bounces light back into shadows. White gives soft fill; silver gives punchy contrast. Position it below your subject to fill in those harsh under-eye shadows .
Try Backlighting
Put the sun behind your subject. This creates a beautiful rim light around their hair and shoulders while keeping their face in shadow (which you can then fill with a reflector). No more squinting .
Use a Diffuser
A diffuser is like a portable cloud. Hold it between the sun and your subject to soften harsh light into beautiful, even illumination .
Camera Settings That Help :
- ISO: Lowest possible (100 or 200)
- Aperture: Smaller (f/8 to f/16) for landscapes; wider (f/2.8 to f/4) for portraits
- Shutter speed: Faster to reduce light
- File format: RAW, always RAW
“Midday light doesn’t have to be a creative limitation—it can be an opportunity for striking, high-impact portraits when approached strategically.”
Putting It All Together: Your Complete Workflow
Here’s your step-by-step plan for every harsh-light photo:
- Import and assess. Look at the histogram. Identify blown highlights and crushed shadows.
- Global highlight recovery. Lower Highlights and Whites first .
- Shadow lift. Raise Shadows just enough to see detail .
- Contrast. Add Contrast and use Tone Curve for depth .
- Color. Fix White Balance, add Vibrance .
- Selective edits. Mask the subject’s face, adjust separately .
- Finishing. Add subtle Vignette and Grain .
- Export. Save as high-quality JPG or PNG.
FAQ Section
Q: Can I fix a photo that’s completely white?
A: If areas are pure white (RGB 255,255,255), the detail is gone forever. However, you can convert to black and white or use creative cropping to make the white space part of your composition .
Q: What’s the best free app for fixing harsh light photos?
A: Snapseed is widely considered the best free mobile option. It has selective adjustments, curves, and all the essential tools .
Q: Should I shoot RAW or JPEG for harsh light?
A: Always shoot RAW if your camera supports it. RAW files contain much more highlight and shadow data, giving you far more room to fix exposure mistakes .
Q: How do I fix an overexposed face without ruining the background?
A: Use selective editing tools—brushes or masks in Lightroom, Selective Adjustments in Snapseed. Only edit the face area .
Q: Is it better to underexpose or overexpose in harsh light?
A: It’s generally better to slightly underexpose (make the photo a bit dark). You can recover shadow detail more easily than you can recover completely blown-out highlights .
Q: What’s the fastest fix for a harsh midday portrait?
A: Lower Highlights by 50-70%, increase Shadows by 20-40%, add a bit of Contrast, and use a Vignette to darken edges. This takes 30 seconds and makes a huge difference .
Q: Can I use filters to prevent overexposure when shooting?
A: Yes! Neutral Density (ND) filters block light without changing colors, letting you use wider apertures or slower shutter speeds even in bright sun .
Q: How do I make harsh light look cinematic?
A: Embrace the contrast rather than fighting it. Deepen blacks, keep highlights bright but detailed, add subtle color grading (teal shadows/warm highlights), and finish with light grain .