How to Invert Image Colors Online – Complete Guide for Beginners (Free Tools & Easy Steps)
Ever looked at a photo and wondered what it would look like with all the colors flipped? Maybe you want to create a cool artistic effect or need to make white text easier to read on a dark background. Whatever your reason, inverting image colors has become super popular for creative projects, presentations, and even fixing visibility issues.
Inverting image colors means changing every color in your picture to its opposite shade on the color wheel. White becomes black, red turns cyan, and blue shifts to orange. You can do this quickly using free online tools without downloading any software. The process takes just a few clicks and works with any image format like JPG, PNG, or GIF. Most online inverters let you preview changes before saving and offer additional editing options too.
What Does Inverting Image Colors Actually Mean?
When you invert colors in an image, you’re basically creating a negative version of your original picture. Think about old film cameras – remember those orange and blue negatives? That’s exactly what happens digitally when you invert colors.
The computer looks at each tiny dot (pixel) in your image and flips it to the opposite color. Here’s how it works:
- Black pixels become white
- White pixels turn black
- Red areas change to cyan (light blue-green)
- Blue sections shift to orange
- Green parts become magenta (pinkish-purple)
This creates some pretty wild effects! Sometimes inverted images look like X-rays or thermal camera shots. Other times, they create artistic masterpieces that grab attention.
Top 5 Free Online Tools to Invert Image Colors
PhotoPea – The Photoshop Alternative
PhotoPea works just like expensive photo editing software but runs completely in your web browser. It’s perfect for people who want professional results without paying monthly fees.
How to use PhotoPea:
- Go to photopea.com
- Click “Open from computer” and choose your image
- Go to Image menu → Adjustments → Invert
- Save your flipped image by clicking File → Export As
Best for: Complex editing projects, working with layers, professional touch-ups
Canva’s Background Remover and Editor
While Canva is famous for making presentations and social media posts, it also has solid image editing tools. The color inversion feature hides inside their photo effects section.
Steps to invert in Canva:
- Create a new design in Canva
- Upload your image
- Click on your image, then “Edit image”
- Look for “Adjust” and find the invert option
- Download your finished result
Best for: Social media images, adding text over inverted backgrounds, quick edits
LunaPic – Simple and Fast
LunaPic keeps things super simple. No account needed, no complicated menus – just upload and invert.
Using LunaPic:
- Visit lunapic.com
- Click “Choose file” and select your image
- Go to Adjust → Negative/Invert Colors
- Right-click the result to save it
Best for: Quick jobs, beginners, anyone who wants zero hassle
Photoshop Express (Free Version)
Adobe offers a free online version of their famous Photoshop software. While it doesn’t have every feature of the full program, color inversion works perfectly.
Process for Photoshop Express:
- Head to photoshop.com/tools
- Upload your image file
- Find “Adjustments” in the toolbar
- Click “Invert” and apply the effect
- Download your inverted image
Best for: People familiar with Adobe products, combining with other photo effects
IMG Online – Batch Processing Champion
If you need to invert colors on lots of images at once, IMG Online saves tons of time with its batch processing feature.
How IMG Online works:
- Go to imgonline.com.ua
- Find the “Invert colors” tool
- Upload single images or multiple files
- Choose your settings and hit process
- Download all your inverted images together
Best for: Processing many images, working with different file types, time-saving projects
Step-by-Step Tutorial: Inverting Colors Like a Pro
Let’s walk through the complete process using one of the most reliable tools. We’ll use LunaPic since it works great for beginners.
Getting Started
First, make sure your image file is ready. Most online tools accept common formats like:
- JPG/JPEG (best for photos)
- PNG (great for images with transparent backgrounds)
- GIF (works for simple graphics)
- BMP (basic bitmap files)
The Inversion Process
Step 1: Open Your Chosen Tool Navigate to lunapic.com in any web browser. The site loads quickly and doesn’t require any plugins or special software.
Step 2: Upload Your Image Click the big “Choose File” button. Browse your computer and select the image you want to invert. The upload usually takes just a few seconds, even for large files.
Step 3: Find the Invert Option Look for the “Adjust” menu at the top of the screen. Click it and you’ll see “Negative/Invert Colors” in the dropdown list.
Step 4: Apply the Effect Click “Negative/Invert Colors” and watch the magic happen! Your image instantly transforms with all colors flipped to their opposites.
Step 5: Save Your Work Right-click on your inverted image and choose “Save image as” from the menu. Pick a location on your computer and give it a descriptive name like “inverted_photo.jpg”
Advanced Tips and Creative Ideas
Working with Different Image Types
Photos of People: Inverted portraits create striking, almost supernatural effects. Skin tones become various shades of blue and green, while eyes often turn bright colors. This works amazingly for Halloween projects or sci-fi themed artwork.
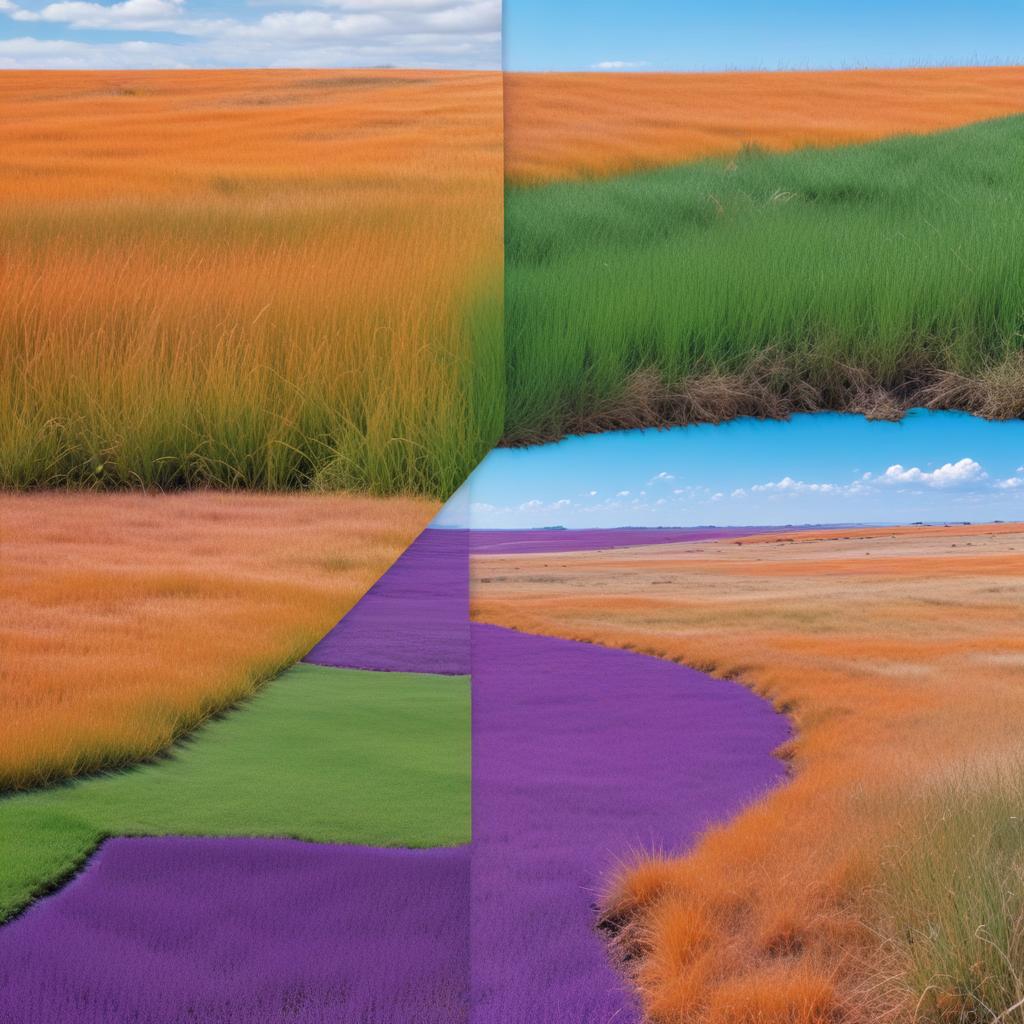
Landscapes: Nature photos look completely alien when inverted. Green grass becomes magenta, blue skies turn orange, and the whole scene feels like it’s from another planet.
Text and Documents: This is super useful for accessibility! White backgrounds with black text become black backgrounds with white text, which many people find easier to read, especially in dark rooms.
Combining Effects for Better Results
Don’t stop at just inverting colors! Try these combinations:
“Invert first, then adjust brightness and contrast for dramatic results that really pop off the screen.”
- Invert + Increase Contrast: Makes colors more vibrant and striking
- Invert + Black and White: Creates interesting negative film effects
- Invert + Blur: Produces dreamy, otherworldly atmospheres
File Format Considerations
| Format | Best Use | File Size | Quality Loss |
|---|---|---|---|
| JPG | Photos, complex images | Small | Some compression |
| PNG | Graphics, transparent backgrounds | Larger | No quality loss |
| GIF | Simple graphics, animations | Medium | Limited colors |
| BMP | Basic editing, archiving | Very large | No compression |
Troubleshooting Common Problems
Image Won’t Upload
- Check file size – most free tools have limits around 10-20MB
- Try different formats – convert weird formats to JPG first
- Clear your browser cache and try again
Colors Look Wrong After Inversion
Sometimes inverted images don’t look quite right. This usually happens with:
- Already edited images that have artificial colors
- Screenshots from phones or computers (different color profiles)
- Very dark or very light images (not much contrast to work with)
Solution: Try adjusting brightness and contrast before inverting, or use a different online tool.
Slow Processing or Crashes
Free online tools sometimes struggle with huge image files. If your tool freezes:
- Resize your image to under 2000 pixels wide
- Use a faster internet connection if possible
- Try a different browser (Chrome usually works best)
Download Issues
If you can’t save your inverted image:
- Disable popup blockers in your browser
- Try right-clicking and “Save image as”
- Check your downloads folder – it might have saved automatically
Creative Uses for Inverted Images
Social Media and Marketing
Inverted images grab attention in crowded social media feeds. They’re perfect for:
- Instagram stories with eye-catching backgrounds
- Facebook posts that need to stand out
- Website headers with unique artistic flair
- Email newsletters with creative visual elements
Educational and Accessibility Applications
Teachers and content creators use inverted images to:
- Make text easier to read for people with visual sensitivities
- Create study materials with better contrast
- Design presentations that work well in dark rooms
- Help students focus on important information
Artistic and Creative Projects
Artists and designers love inverted colors for:
- Digital art projects with surreal themes
- Photo manipulations that challenge reality
- Album covers and music promotional materials
- Fashion photography with avant-garde styles
FAQ Section
Q: Will inverting colors reduce my image quality? A: Most online tools preserve your original image quality during color inversion. However, saving in JPG format might add slight compression. For best results, save as PNG if file size isn’t a concern.
Q: Can I invert colors on animated GIFs? A: Yes! Many online tools handle animated GIFs, though processing takes longer. Each frame gets inverted individually while maintaining the animation timing.
Q: Is it legal to invert colors on any image I find online? A: Color inversion doesn’t change copyright laws. You still need permission to use someone else’s photos, even if you invert the colors. Always use your own images or royalty-free stock photos.
Q: Why do some inverted images look muddy or unclear? A: Images with lots of mid-tone colors (grays, muted colors) often don’t invert as dramatically. Photos with strong contrast between light and dark areas usually produce better results.
Q: Can I undo color inversion if I don’t like the result? A: Once you save an inverted image, you can’t undo it from that file. However, inverting an already-inverted image brings it back to normal! Always keep your original file as backup.
Q: Do these online tools work on mobile phones and tablets? A: Absolutely! Most modern online image editors work great on smartphones and tablets. The interface might look slightly different, but all the same features are available.
Q: How long does the inversion process usually take? A: For typical photos (under 5MB), color inversion happens almost instantly – usually within 2-3 seconds. Larger files or slow internet connections might take 10-15 seconds.
Q: Can I batch invert multiple images at once? A: Some tools like IMG Online offer batch processing. However, most free online editors handle one image at a time to keep things simple and fast.