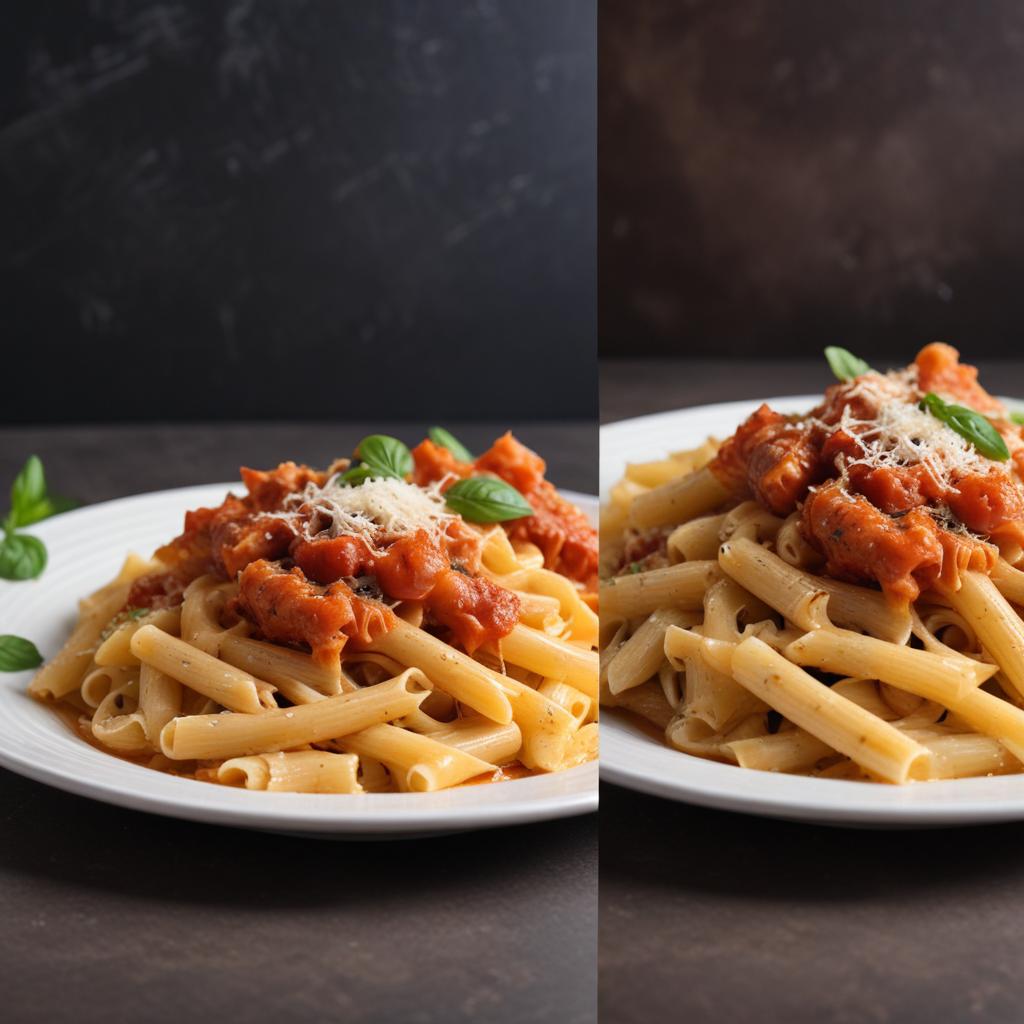
Restaurant Food Photography Editing Tips: Make Your Dishes Look Irresistible
Great food photos can make or break a restaurant’s success on social media and review sites. Even the most delicious meal might look unappetizing in photos without proper editing techniques. Learning how to enhance your restaurant’s food photography through smart editing will help attract more customers and showcase your culinary creations in their best light.
Food photography editing transforms ordinary restaurant photos into mouth-watering images that make viewers want to visit immediately. The key is enhancing natural colors, improving lighting, and making textures pop without creating unrealistic expectations. Professional food editing focuses on bringing out the appetizing qualities already present in your dishes while fixing common photography problems like poor lighting, dull colors, or distracting backgrounds.
Why Food Photography Editing Matters for Restaurants
The Impact of Visual Appeal on Customer Decisions
Studies show that 70% of diners choose restaurants based on food photos they see online. When your dishes look vibrant and appetizing in photos, customers are more likely to:
- Make reservations
- Order specific menu items
- Share photos on social media
- Leave positive reviews
- Return for future visits
Poor food photography can hurt your business even if the actual food tastes amazing. Customers form expectations based on what they see, so your photos need to accurately represent your food while highlighting its best features.
Common Food Photography Problems
Most restaurant photos suffer from these issues:
- Dull, lifeless colors that make food look unappetizing
- Poor lighting that creates harsh shadows or washed-out appearance
- Cluttered backgrounds that distract from the main dish
- Uneven exposure across the plate
- Color casts from artificial restaurant lighting
Smart editing techniques can fix all these problems and more.
Essential Tools for Food Photo Editing
Before starting your editing journey, you’ll need the right software and understand which tools work best for different tasks.
| Software Category | Best Options | Ideal For | Cost |
|---|---|---|---|
| Professional Software | Adobe Photoshop, Lightroom | Complete control, batch editing | Monthly subscription |
| Free Alternatives | GIMP, Canva, Paint.NET | Basic editing, budget-friendly | Free |
| Mobile Apps | Snapseed, VSCO, Adobe Lightroom Mobile | Quick edits, social media posting | Free to low cost |
| Online Editors | Photopea, Pixlr, Canva | No software installation needed | Free with limitations |
Key Editing Features You’ll Use Most
- Color correction for natural, appetizing hues
- Exposure adjustment to balance light and shadows
- Saturation controls to make colors pop
- Sharpening tools to enhance food textures
- Background removal for clean presentations
- Selective editing to enhance specific areas
Step-by-Step Food Photo Editing Process
Step 1: Analyze Your Raw Image
Open your food photo and examine it carefully at 100% zoom. Look for these common issues:
- Exposure problems – too bright or too dark areas
- Color temperature issues – yellow/orange or blue color casts
- Composition flaws – tilted plates or distracting elements
- Focus problems – blurry areas that should be sharp
- Background distractions – messy table settings or unwanted objects
Make notes about what needs fixing before you start editing.
Step 2: Basic Corrections First
Always handle fundamental issues before moving to creative enhancements:
Straighten and Crop
- Use the straighten tool to level tilted plates
- Crop out distracting elements
- Follow the rule of thirds for better composition
Exposure Adjustment
- Brighten underexposed areas using exposure or brightness controls
- Tone down overly bright highlights
- Ensure the food is properly lit without losing detail
Color Temperature Correction Restaurant lighting often creates color casts. Adjust the temperature slider to remove:
- Yellow/orange casts from warm indoor lighting
- Blue casts from fluorescent lights
- Green tints from mixed lighting sources
Step 3: Enhance Colors Naturally
This step makes the biggest difference in food photography.
Saturation vs. Vibrance
- Use vibrance instead of saturation for more natural results
- Vibrance protects skin tones and prevents oversaturation
- Increase vibrance by 15-30% for most food photos
Selective Color Enhancement Focus on enhancing specific colors that appear in your dish:
- Reds for tomatoes, meat, berries
- Greens for vegetables and herbs
- Yellows and oranges for pasta, bread, citrus
- Blues sparingly, mainly for plates or backgrounds
“The goal is to make food look as delicious as it tastes in real life, not to create unrealistic cartoon colors.” – Professional food photographer
Advanced Editing Techniques
The Food-Specific Color Grading Method
Food photography benefits from specific color adjustments that work differently than portrait or landscape editing.
Warm Highlights, Cool Shadows
- Add slight warmth to highlights (makes food glow)
- Keep shadows neutral or slightly cool
- This creates depth and makes food appear more three-dimensional
Mid-tone Color Enhancement
- Boost oranges and yellows in mid-tones for warmth
- Enhance reds for meat and sauce appeal
- Adjust greens to make vegetables look fresh and healthy
Texture Enhancement Strategies
Food photography is all about making viewers almost taste the texture.
Smart Sharpening
- Apply sharpening selectively to food surfaces
- Avoid over-sharpening sauce or liquid areas
- Use masking to protect smooth backgrounds
Local Contrast Enhancement
- Increase clarity or structure on textured foods
- Enhance the contrast between different food elements
- Make crispy edges appear more defined
Background and Environment Editing
Clean Background Techniques
- Remove distracting utensils or table clutter
- Use the clone stamp or healing brush for small objects
- Consider background replacement for major changes
Depth of Field Adjustment
- Blur backgrounds slightly more to make food pop
- Keep the main dish sharp while softening surroundings
- Use gradient masks for natural-looking blur transitions
Lighting and Shadow Work
Fixing Common Lighting Problems
Restaurant lighting rarely provides ideal conditions for food photography.
Shadow Recovery
- Lift dark areas without making them look flat
- Maintain some shadows for dimension
- Use graduated filters for selective lightening
Highlight Management
- Recover blown-out highlights on shiny surfaces
- Reduce harsh reflections on plates or glassware
- Balance overall exposure for even lighting
Creating Appetizing Light
Good food photos have a warm, inviting quality that makes food look fresh and delicious.
Golden Hour Effect
- Add warmth to highlights for a natural glow
- Increase exposure slightly on food surfaces
- Create subtle light falloff toward edges
Color Psychology in Food Photography
Colors That Increase Appetite
Understanding color psychology helps create more effective food photos:
- Warm reds and oranges stimulate appetite and excitement
- Rich browns suggest comfort food and satisfaction
- Fresh greens imply health and freshness
- Golden yellows create feelings of happiness and warmth
Colors to Use Sparingly
- Blues can suppress appetite (use mainly for backgrounds)
- Purples work well for specific foods but can look artificial
- Stark whites can make food look clinical rather than appetizing
Mobile Editing for Quick Results
Best Mobile Apps for Restaurant Photos
Snapseed (Free)
- Professional-quality selective editing
- Great for quick color and exposure fixes
- Excellent healing tool for cleanup
VSCO (Free with premium options)
- Film-inspired filters perfect for food
- Precise manual controls
- Great for maintaining natural colors
Adobe Lightroom Mobile (Free with premium features)
- Professional desktop features in mobile form
- Excellent for batch editing multiple photos
- Cloud sync for editing across devices
Quick Mobile Editing Workflow
- Straighten and crop for better composition
- Auto-enhance as a starting point
- Adjust exposure to brighten food
- Increase vibrance for richer colors
- Add subtle warmth for appetite appeal
- Sharpen food textures lightly
- Export at high quality for social media
Social Media Optimization
Platform-Specific Considerations
- Square or vertical crops work best
- Bright, vibrant colors perform well
- Maintain consistent editing style across posts
- Horizontal images get more engagement
- Focus on storytelling with your edits
- Less aggressive editing than Instagram
Google My Business
- Natural colors that accurately represent food
- Good lighting to show restaurant atmosphere
- Clean, professional appearance
Common Food Editing Mistakes
Over-Processing Warning Signs
Watch for these problems that can hurt your restaurant’s image:
- Unnatural neon colors that don’t exist in real food
- Over-sharpening that creates harsh, digital-looking edges
- Excessive saturation that makes food look artificial
- Completely eliminating shadows making food look flat
- Inconsistent editing styles across different photos
Maintaining Realistic Expectations
Your edited photos should accurately represent what customers will receive. Avoid:
- Making portions appear larger than they actually are
- Adding colors that don’t exist in your actual dishes
- Over-editing to hide poor food presentation
- Creating unrealistic lighting that can’t be matched in person
Remember: Great editing enhances good photography but can’t fix fundamental problems with food presentation or photography technique.
Batch Editing for Efficiency
Creating Consistent Restaurant Style
Develop a Signature Look
- Create custom presets or filters for your restaurant
- Maintain consistent color grading across all photos
- Use similar cropping and composition styles
Efficient Workflow Tips
- Edit one photo perfectly, then apply similar settings to others
- Use batch processing features when available
- Create templates for different types of dishes
- Save frequently used adjustment combinations
Time-Saving Strategies
- Shoot in good lighting to minimize editing time
- Use consistent camera settings for predictable results
- Group similar photos for batch editing
- Create editing checklists to streamline your process
FAQ Section
Q: How much editing is too much for restaurant food photos? A: If the edited photo doesn’t accurately represent what customers will receive, it’s too much. Enhance natural qualities but don’t create unrealistic expectations.
Q: What’s the most important editing adjustment for food photography? A: Color correction and temperature adjustment make the biggest difference. Proper white balance makes food look natural and appetizing rather than sickly or artificial.
Q: Should I remove all imperfections from food photos? A: Remove obvious flaws like crumbs or spills, but keep natural textures and variations that make food look real and handmade rather than artificial.
Q: How do I make food look hot and fresh in photos? A: Add warmth to highlights, enhance steam or bubbling effects if present, and use slight glow effects on warm dishes. Avoid making cold dishes look artificially warm.
Q: What’s the best way to edit photos of dark restaurants? A: Brighten selectively focusing on the food while keeping some ambient restaurant mood. Use gradient masks to lighten food areas without overexposing the entire image.
Q: How can I make vegetables look more vibrant? A: Increase vibrance rather than saturation, enhance greens specifically in color adjustment panels, and add slight contrast to make textures pop while maintaining natural appearance.
Q: Should I use the same editing style for all types of food? A: Adapt your editing approach to different cuisines and dishes. Comfort food might benefit from warmer tones, while fresh dishes might need cooler, cleaner editing.
Q: How do I edit photos of messy or saucy dishes? A: Focus on enhancing the appealing messiness rather than trying to clean it up. Make sauces look glossy and rich, enhance texture contrasts, and ensure good color separation between elements.