Film Photography Digital Editing Recreation: Master the Vintage Film Look in Digital Photos
Digital cameras are everywhere today, but something magical happens when you see an old film photograph. The warm colors, soft grain, and dreamy quality make you feel nostalgic for times you might not have even lived through. Many photographers wonder how they can capture that same feeling with their modern digital cameras and editing software.
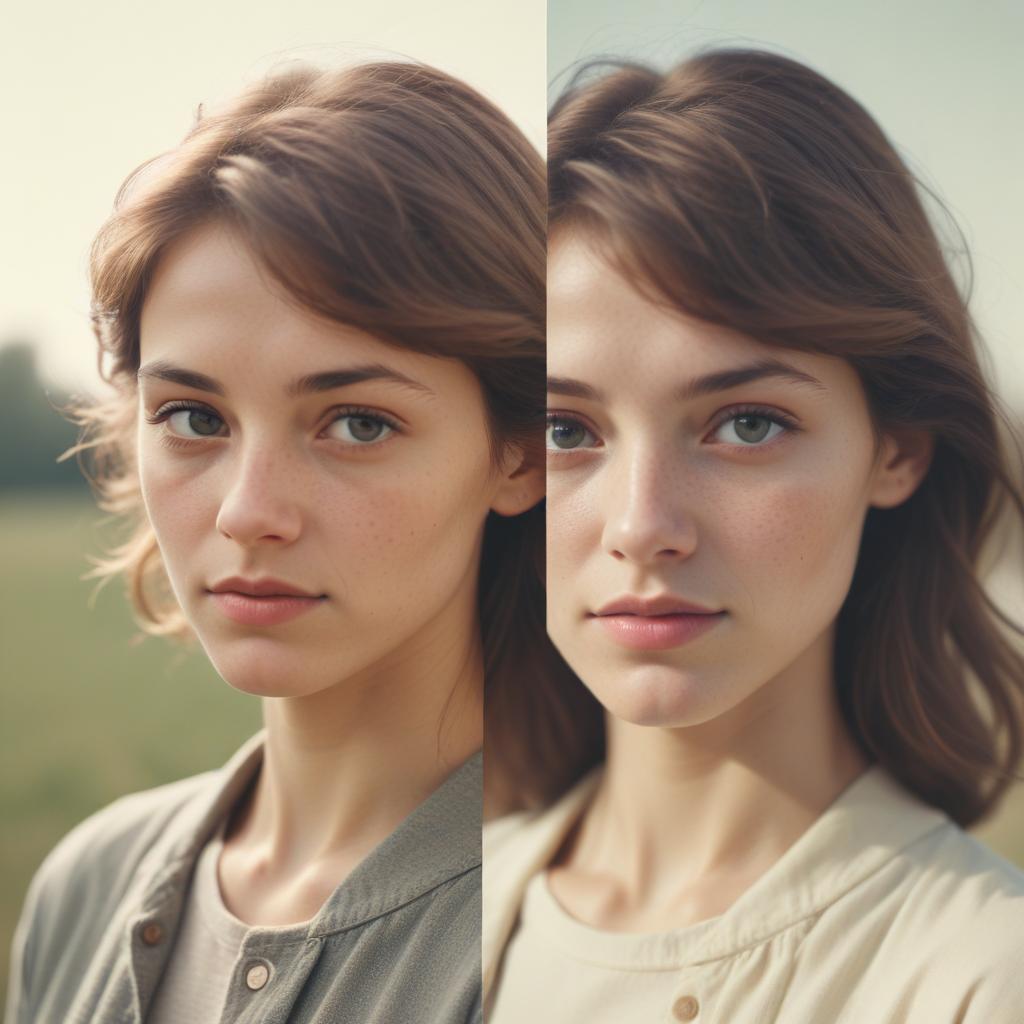
Film photography digital editing recreation is the art of making digital photos look like they were shot on classic film stocks. This process involves understanding how different films created their unique looks, then using digital tools to recreate those characteristics. You can transform boring digital images into stunning vintage masterpieces that capture the soul and warmth of analog photography. Whether you shot with a phone, DSLR, or mirrorless camera, the right editing techniques can give your photos that timeless film aesthetic that everyone loves.
Understanding the Magic Behind Film Photography
What Made Film Photos Look Special
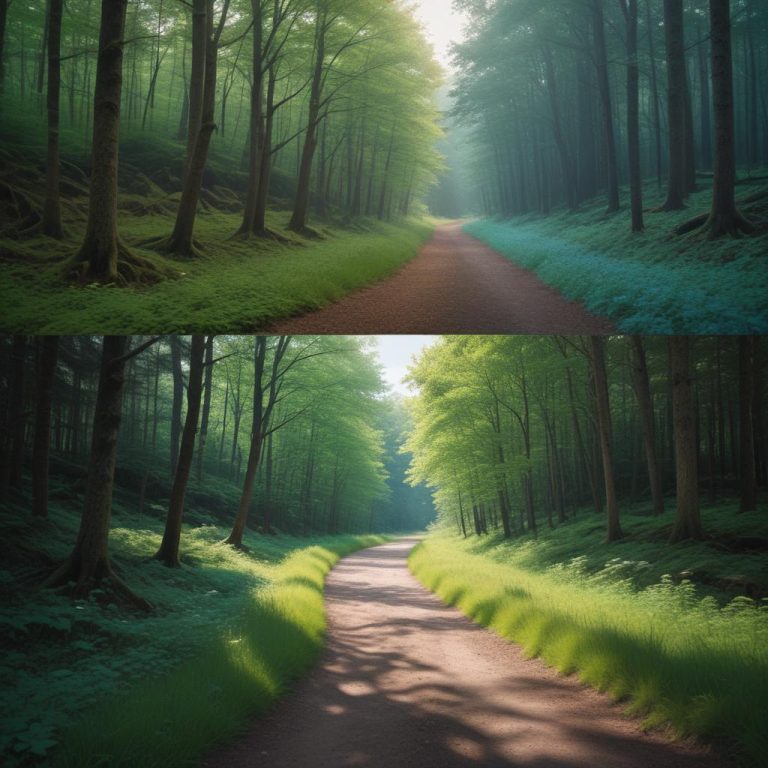
Film photography wasn’t just about taking pictures – it was about creating art through chemical reactions. Each type of film had its own personality. Kodak Portra gave skin tones a warm, peachy glow. Fuji films created vibrant greens and blues that made landscapes pop. Black and white films like Tri-X had distinctive grain patterns that added character to every shot.
The magic happened in the darkroom too. Different developing chemicals, paper types, and printing techniques all influenced the final look. Some photographers pushed or pulled their film (over or under-developing) to create specific moods and contrast levels.
The Science of Film Grain and Color
Real film grain came from tiny silver crystals in the emulsion. Higher ISO films had larger, more visible grain that created texture and atmosphere. The grain wasn’t random – it followed patterns based on the film’s chemical structure.
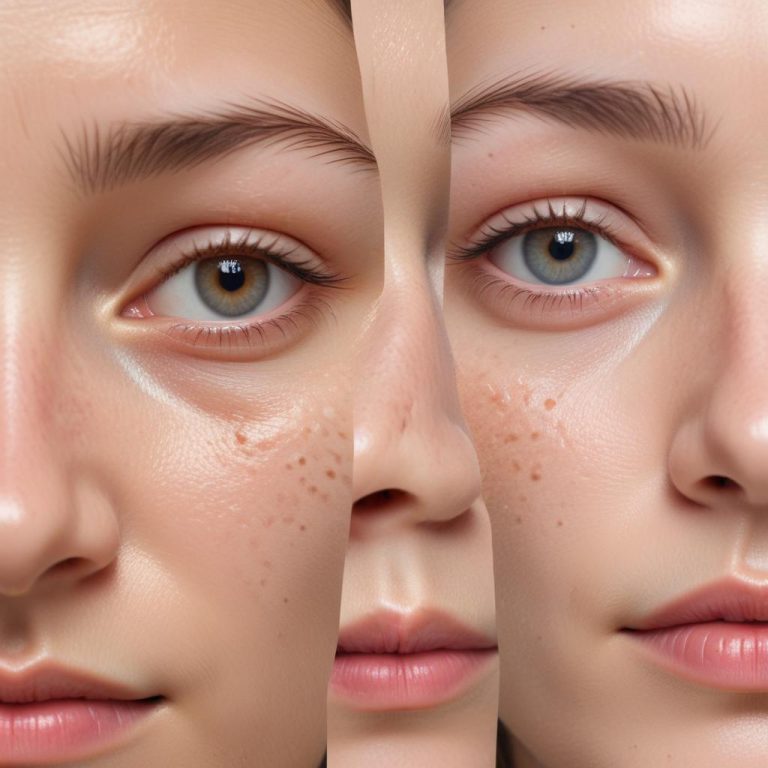
Film colors worked differently than digital sensors. Film captured light through multiple layers of dyes that created natural color transitions and pleasing skin tones. This is why film photos often look more “lifelike” than straight-out-of-camera digital images.
Essential Tools for Digital Film Recreation
Software Options for Every Budget
Adobe Lightroom remains the most popular choice for film photography digital editing recreation. Its built-in film presets and powerful color grading tools make it perfect for beginners and professionals alike. The HSL (Hue, Saturation, Luminance) panel lets you fine-tune colors exactly like different film stocks.
RNI Films specializes in accurate film emulations. This software studied real film stocks under laboratory conditions to create incredibly realistic digital recreations. Their presets work as plugins for Lightroom, Photoshop, and other editing programs.
VSCO started as a film emulation company and still offers some of the best mobile film presets available. Their app works great for quick edits on your phone, while their desktop presets provide professional-level results.
Free Alternatives That Actually Work
Darktable is a powerful open-source alternative to Lightroom that includes film emulation modules. It’s completely free and works on Windows, Mac, and Linux computers.
FilmLab for mobile devices does an amazing job recreating specific film looks. While some features require payment, the free version includes enough tools to get started with film recreation.
Photopea runs in your web browser and includes many Photoshop-like features for free. You can load film emulation actions and presets to recreate vintage looks without expensive software.
Step-by-Step Film Recreation Techniques
Starting with the Right Digital Image
The quality of your final result depends heavily on your starting photo. Shoot in RAW format whenever possible – this gives you much more flexibility when recreating film characteristics. Pay attention to lighting conditions that favor film aesthetics:
- Golden hour lighting creates warm, romantic tones
- Overcast days provide soft, even light similar to film
- Indoor tungsten lighting gives that cozy, vintage atmosphere
- Natural window light mimics classic portrait film looks
Avoid harsh midday sun and extreme contrast situations that digital sensors handle poorly compared to film.
Color Grading Like Classic Films
The secret to convincing film photography digital editing recreation lies in understanding color relationships. Here’s how to approach different film stocks:
Kodak Portra Recreation: Start by warming up the overall temperature slightly. In the HSL panel, push orange luminance up while pulling yellow luminance down. This creates the signature peachy skin tone look. Add a subtle orange tint to the highlights and a cyan tint to the shadows using split toning.
Fuji Film Simulation: Fuji films are known for punchy colors and strong contrast. Increase overall saturation, but be selective – boost greens and blues more than reds and oranges. Add contrast through the tone curve rather than the basic contrast slider for more authentic results.
Kodachrome Recreation: This legendary slide film had incredible color saturation and contrast. Push the whites up and blacks down for that classic slide film look. Increase vibrance more than saturation to avoid oversaturated skin tones.
Adding Realistic Film Grain
Digital noise and film grain are completely different things. Film grain has structure and character, while digital noise looks random and ugly. Here’s how to add convincing grain:
Use dedicated grain plugins like FilmConvert or RNI Films rather than your editing software’s basic noise filter. These tools recreate the actual grain structure of specific films.
Layer different grain sizes for authenticity. Real film had both fine and coarse grain elements working together. Start with a subtle base grain, then add a second layer of larger grain at lower opacity.
Vary grain by tone. Film grain appeared differently in highlights, midtones, and shadows. Most film emulation tools handle this automatically, but manual adjustments can improve realism.
Recreating Specific Film Stocks Digitally
Black and White Film Emulations
Kodak Tri-X Recreation: This classic street photography film had moderate contrast and beautiful grain. Start with a slight warm tone (not pure black and white). Use a gentle S-curve for contrast, and add grain that’s visible but not overwhelming. Tri-X handled highlights well, so don’t clip your whites too aggressively.
Ilford HP5 Plus Recreation: HP5 has finer grain than Tri-X and slightly cooler tones. Use a minimal warm tone or go completely neutral. The contrast should be slightly lower than Tri-X, with smooth tonal transitions. This film pushed well, so don’t be afraid to lift your shadows and add some atmospheric haze.
Color Negative Film Looks
Kodak Gold Recreation: This consumer film had a distinctive yellow/green cast that sounds ugly but actually looks great. Add yellow to your highlights and green to your midtones. Keep saturation moderate – Gold wasn’t known for punchy colors, but rather for pleasant, nostalgic tones.
Fuji 400H Recreation: Famous for beautiful skin tones and pastel colors. This film had lower contrast than most, creating a dreamy, soft look. Pull down your contrast and add a slight magenta tint to the shadows. Boost luminance in the orange and yellow ranges for glowing skin tones.
Advanced Techniques for Authentic Results
Mimicking Darkroom Printing Effects
Real film photos went through additional processing in the darkroom that affected their final appearance. You can recreate these effects digitally:
Paper Grade Simulation: Different printing papers had various contrast characteristics. Use multiple contrast adjustments with masking to simulate how highlights and shadows would print on different paper grades.
Chemical Toning Effects: Sepia, selenium, and other chemical toners created specific color shifts. Use split toning or color grading to recreate these looks, but keep them subtle – real chemical toning was often barely noticeable.
Dodging and Burning Patterns: Film photographers selectively lightened and darkened areas during printing. Study classic film photographs to see common dodging and burning patterns, then apply similar adjustments to your digital recreations.
Creating Believable Imperfections
Perfect digital images don’t look like film. Real analog photography had beautiful imperfections that added character:
Light Leaks: These happen when film gets exposed to unwanted light. Add subtle orange or yellow gradients near the edges of your photos. Keep them very subtle – most real light leaks were barely visible.
Dust and Scratches: Film and negatives collected dust and scratches over time. Add tiny white specks and thin lines sparingly. Less is more – too many imperfections look fake.
Vignetting: Most film lenses created natural vignetting (darkening around the edges). Add a subtle vignette that matches the focal length you’re trying to emulate.
Film Recreation Comparison Table
| Film Stock | Color Character | Grain Quality | Best Use Cases | Digital Recreation Key Points |
|---|---|---|---|---|
| Kodak Portra 400 | Warm, peachy skin tones | Fine, smooth | Portraits, weddings | Orange highlights, cyan shadows |
| Fuji Pro 400H | Pastel, dreamy colors | Very fine | Fashion, lifestyle | Low contrast, magenta shadows |
| Kodak Gold 200 | Yellow-green cast | Medium grain | Everyday snapshots | Yellow highlights, nostalgic feel |
| Kodachrome 64 | Saturated, contrasty | Very fine | Landscapes, travel | High saturation, strong contrast |
| Tri-X 400 | Warm B&W tones | Classic grain | Street photography | Moderate contrast, visible grain |
| Ilford HP5 Plus | Cool B&W tones | Fine grain | General B&W work | Smooth tones, minimal grain |
| Fuji Superia 400 | Vibrant greens/blues | Medium grain | Outdoor photography | Punchy colors, good contrast |
| Agfa Vista 200 | Cool, clinical look | Fine grain | Documentary work | Neutral tones, sharp detail |
Common Mistakes to Avoid
Over-Processing Your Images
The biggest mistake beginners make is pushing effects too far. Real film was often subtle. If your grain looks like digital noise, you’ve added too much. If your colors look like a Instagram filter, you’ve gone overboard.
Start with small adjustments and build up gradually. It’s easier to add more effect than to pull back from over-processing.
Ignoring the Original Context
Different films were designed for specific purposes. Don’t try to make a bright sunny landscape look like indoor tungsten film – it won’t work convincingly. Match your film recreation to appropriate lighting and subject matter.
Forgetting About Lens Characteristics
Film cameras used different lenses than modern digital cameras. Classic film lenses had specific bokeh, flare, and sharpness characteristics. Research the lens typically used with your chosen film stock and try to match those qualities.
Using Generic “Vintage” Filters
Avoid one-size-fits-all vintage filters that don’t represent any specific film stock. These often look obviously digital and lack the nuanced color relationships that made real films special.
Building Your Film Recreation Workflow
Organizing Your Presets and Actions
Create a systematic approach to film photography digital editing recreation:
Separate presets by film type – color negative, slide film, black and white. Name presets descriptively – “Portra 400 Overcast” tells you more than “Film Look 3.” Save multiple versions of the same film stock for different lighting conditions.
Batch Processing for Consistency
When recreating film looks across multiple images from the same shoot:
Apply base film preset to all images first
Make individual adjustments for exposure and white balance
Fine-tune colors while maintaining the overall film character
Add grain and imperfections consistently across the series
This workflow ensures your digital film recreations look like they came from the same roll of film.
Reference and Comparison Methods
Always work with reference images of real film photography. Create a reference folder with scans of actual film stocks in various lighting conditions. Use split-screen comparisons to check your progress against authentic examples.
Study film photography books and exhibitions to understand how different films looked when printed. Digital screens show colors differently than photographic prints, so understanding the intended final output helps create better recreations.
Tips for Shooting Digital with Film in Mind
Camera Settings That Help
Modern digital cameras offer tools that make film recreation easier:
Shoot in RAW format always – this gives maximum flexibility for color grading. Use lower ISO settings when possible to minimize digital noise that interferes with film grain addition. Slightly underexpose your images – film handled overexposure better than digital sensors, but you can recover shadows easier than blown highlights.
Composition and Lighting Choices
Think like a film photographer when shooting digital:
Use available light whenever possible – flash was expensive and difficult with film. Compose more carefully – film photographers couldn’t take hundreds of shots and pick the best one. Pay attention to backgrounds – film’s shallow depth of field naturally separated subjects from busy backgrounds.
The Psychology of Film Aesthetics
Why We Love the Film Look
There’s science behind our attraction to film aesthetics. The grain structure creates visual interest that our brains find pleasing. Color response curves that roll off gradually look more natural than digital’s linear response. Slight imperfections make images feel more human and authentic.
Film photos also carry emotional weight because they represent permanent, physical objects. Each film frame cost money and couldn’t be deleted, so photographers were more thoughtful about their shots.
Cultural Associations with Different Film Stocks
Different films evoke specific time periods and moods:
- Kodachrome reminds us of 1960s-70s family vacations and National Geographic
- Tri-X brings back memories of classic street photography and photojournalism
- Portra feels like modern professional wedding and portrait photography
- Instant film creates nostalgia for immediate, imperfect memories
Understanding these associations helps you choose the right film recreation for your intended message.
Future of Film Recreation Technology
AI-Powered Film Emulation
New artificial intelligence tools are analyzing thousands of real film photographs to create incredibly accurate digital recreations. These systems understand not just color and grain, but also how different films responded to various lighting conditions and subjects.
Real-Time Film Processing
Mobile phones and cameras are starting to include real-time film emulation that processes images as you shoot them. This lets you see the film look in your viewfinder and creates more authentic results than post-processing.
Hybrid Film-Digital Workflows
Some photographers are combining real film scanning with digital editing to get the best of both worlds. They shoot on actual film for the authentic base characteristics, then use digital tools for fine-tuning and finishing.
Frequently Asked Questions
Q: Can I make digital photos look exactly like film?
A: Very close, but not exactly. Digital sensors capture light differently than film emulsion, so there will always be subtle differences. However, good film photography digital editing recreation can create results that are virtually indistinguishable from real film to most viewers.
Q: Which film stocks are easiest to recreate digitally?
A: Black and white films like Tri-X and HP5 are generally easier to recreate because you’re only dealing with tones and grain, not complex color relationships. Among color films, Kodak Portra and Fuji 400H have well-documented characteristics that make them good starting points.
Q: Do I need expensive software for convincing film recreation?
A: Not necessarily. While professional tools like Lightroom and dedicated film emulation plugins produce the best results, free alternatives like Darktable and mobile apps like VSCO can create impressive film looks. The key is understanding color relationships and film characteristics, not just using expensive presets.
Q: How do I avoid the “fake vintage” look?
A: Study real film photography extensively and use reference images. Avoid over-processing – real film was often subtle. Don’t add every vintage effect at once (grain, light leaks, fading, etc.). Most importantly, start with well-lit, properly composed photos that would have looked good on film originally.
Q: Should I shoot differently when planning to recreate film looks?
A: Yes, absolutely. Expose slightly more conservatively than you might for typical digital processing. Pay attention to lighting quality – film looked best in conditions with good natural light. Compose more carefully since film photographers couldn’t take hundreds of shots and choose later.
Q: Can I recreate film looks with smartphone photos?
A: Yes, though the results may not be as convincing as with dedicated cameras. Modern smartphones capture high-quality images that respond well to film recreation techniques. Apps like VSCO, FilmLab, and Lightroom Mobile make it easy to apply film looks directly on your phone. The key is starting with well-exposed photos taken in good light.