AI Portrait Retouching: Flawless Skin in One Click
You just took a portrait with perfect expression and light, but all you can see is one distracting blemish, some under-eye shadows, or skin texture that doesn’t look quite right.
For years, achieving that polished, magazine-cover look required expert skills in programs like Photoshop. You had to master techniques like frequency separation, dodging and burning, and manual cloning. It was an art form that took years to perfect. Today, Artificial Intelligence has transformed portrait retouching. With a single click or a simple slider, you can now achieve natural-looking, flawless skin in seconds. This guide will show you how AI is making professional portrait retouching accessible to everyone, without the steep learning curve.
How AI “Sees” and Fixes Skin: Smarter Than a Filter
AI skin retouching is far more sophisticated than the “blur everything” filters of the past. Think of it as having a brilliant, detail-obsessed assistant who understands human anatomy.
The AI is trained on millions of portrait images. It has learned to distinguish between:
- Temporary Flaws: Blemishes, pimples, under-eye bags, and temporary redness.
- Permanent Features: Pores, beauty marks (moles), freckles, wrinkles, and the natural texture that gives skin its character.
- Structure & Lighting: The contours of the face, where highlights and shadows naturally fall.
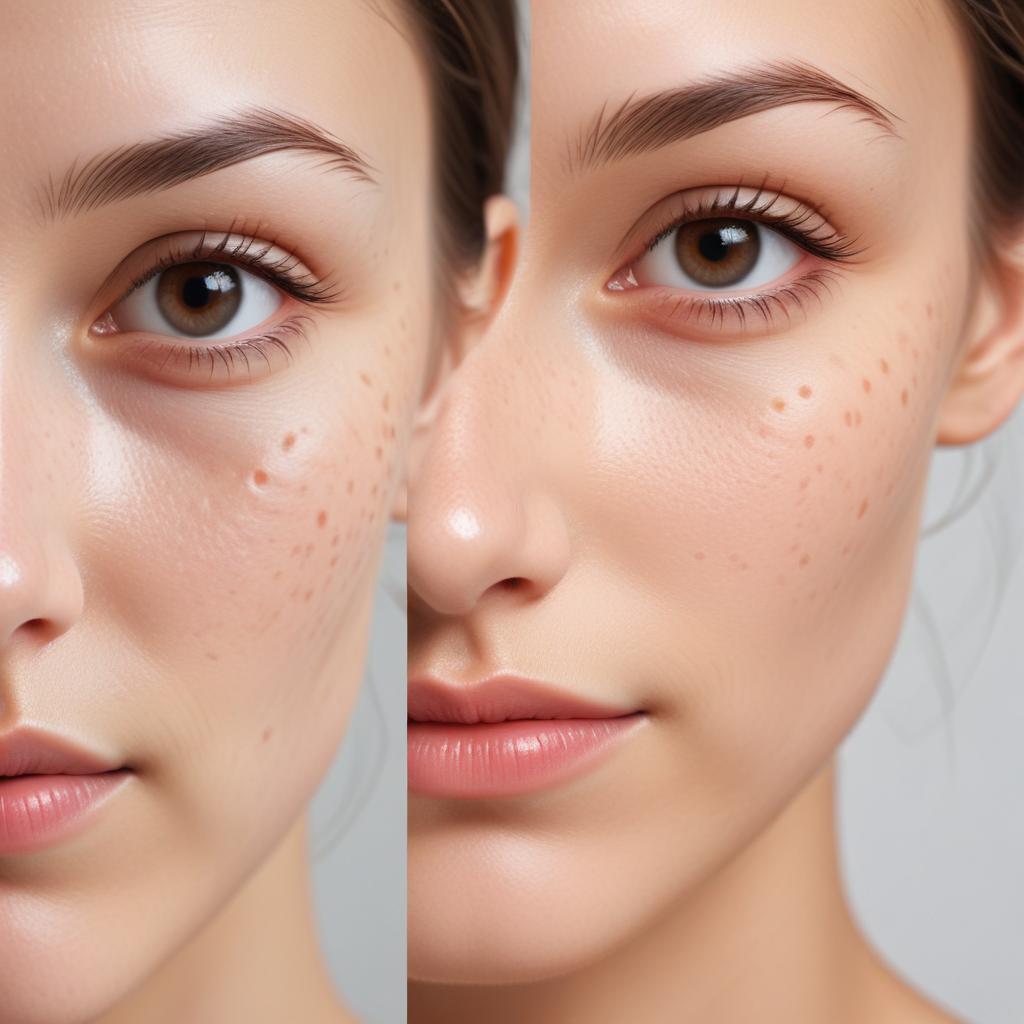
When you apply an AI retouch, it doesn’t just smear pixels. It analyzes each region of the face and makes intelligent, localized adjustments: reducing the appearance of a blemish while preserving the pore right next to it, or softening a shadow under the eye without affecting the eyelash detail.
“The goal of great AI retouching isn’t to create plastic skin, but to reveal the person at their most refreshed and confident, keeping every detail that makes them unique.”
Your Toolkit: The AI Retouching Features at Your Fingertips
Modern photo editors, from mobile apps to professional suites, are packed with AI-powered tools specifically for portraits. Here’s what they can do.
1. The “One-Click Wonder”: Automatic Portrait Enhancers
This is the easiest starting point. Apps like Luminar Neo, Photoshop Express, or FaceTune have a button often called “AI Enhance,” “Portrait Magic,” or “Perfect Skin.”
- What it does: With one tap, it applies a balanced suite of adjustments: mild skin smoothing, eye brightening, teeth whitening, and sometimes even subtle face sculpting.
- Best for: Getting a quick, overall polish for social media or personal photos. It’s fast and requires zero technical knowledge.
2. Precision Sliders: Control the Level of “Perfection”
For more control, dedicated AI sliders are a game-changer. Look for these in tools like Adobe Lightroom (via AI masks), Luminar, or Skylum’s Portrait Studio.
- Skin Smoothing / Blemish Removal: Reduces the visibility of pores and temporary imperfections. The key here is the slider—you can choose between 20% (natural texture) and 100% (plastic smoothness).
- Under-Eye Correction: Specifically targets dark circles and bags, lightening and smoothing just that area without affecting the rest of the skin.
- Face Contour & Sculpting: Can subtly enhance facial structure by sliming the face, defining the jawline, or enlarging eyes. Use with extreme subtlety for natural results.
- Eye Enhance & Teeth Whitening: Brightens the whites of the eyes and teeth with a single slider, making subjects look more awake and vibrant.
3. The Professional’s Secret: AI-Powered Local Masks
This is where the magic gets truly powerful for serious editors. In Adobe Photoshop and Lightroom, you can use AI to create masks automatically.
- How it works: Right-click on a person and select “Create AI Mask.” The software instantly generates separate masks for Skin (Face), Skin (Body), Eyes, Irises, Teeth, Hair, and even Clothing. You can then adjust each element independently—warming up the skin tone, sharpening the irises, and smoothing the skin—all with perfect, automatic selections that would take 30 minutes to do manually.
The table below shows which tool to use for different needs, from quick fixes to full professional control.
| Your Goal | The AI Tool to Use | Skill Level & Time |
|---|---|---|
| A quick, all-over polish for a social media selfie. | One-Click Auto Enhancer (in apps like Luminar Neo or FaceTune) | Beginner. 5 seconds. |
| Remove specific blemishes while keeping skin texture real. | AI-Powered Healing/Blemish Brush (in Photoshop, Lightroom, Photoroom) | Beginner. 30 seconds. |
| Subtly smooth skin, brighten eyes, and whiten teeth with full control. | Dedicated AI Portrait Sliders (in Luminar, Lightroom, Skylum tools) | Intermediate. 1-2 minutes. |
| Perform detailed, professional-grade retouching on a client shoot. | AI-Generated Local Masks in Photoshop/Lightroom, combined with manual tweaks. | Advanced/Pro. 5-10 minutes per image. |
The “Flawless but Real” Workflow: A Step-by-Step Guide
Here’s how to use these tools to get a natural, magazine-quality result from a raw portrait.
- Start with a Great Base: Begin with global corrections. Adjust the overall exposure, contrast, and white balance of your photo. A well-lit photo needs less retouching.
- Apply Broad AI Corrections (The First Click): Use your software’s “Select Subject” or “AI Portrait Mask” feature. With the person isolated, make subtle adjustments to the overall tone and color of their skin.
- Target Specific Areas with AI Sliders: Now, dive into the specialized sliders.
- Move the “Smooth Skin” slider to 20-40%. This is the sweet spot for reducing imperfections while keeping pores and texture.
- Use the “Under-Eye” slider at 30-50% to soften dark circles.
- Gently nudge the “Eye Brighten” and “Teeth Whiten” sliders (10-30%).
- Manual Spot Fix (The Pro Touch): Even the best AI might miss one stubborn blemish. Use a traditional Healing Brush or Spot Removal tool to zap it.
- The Final, Crucial Step: Zoom out to 100% view. Toggle your edits on and off. Does the person look like themselves, just refreshed? If the skin looks waxy or plastic, reduce the strength of your sliders. The goal is enhancement, not alteration.
The Ethics of AI Retouching: A Necessary Conversation
The ease of AI retouching brings power and responsibility.
- For Personal & Professional Portraits: The goal is usually to present the subject in their best light—well-rested and confident—which is a standard practice in professional photography.
- For Social Media & Self-Image: It’s vital to be aware of how heavily altered images can distort our perception of beauty. Using AI tools with a light, realistic touch is key.
- The Golden Rule: Always retain the subject’s essential character. Don’t remove beauty marks, drastically reshape facial features, or erase all signs of aging. Retouch to reveal, not to rebuild.
Frequently Asked Questions
Will AI skin retouching make everyone look fake?
Only if you let it. The sliders give you control. The most common mistake is pushing the “Smooth Skin” effect to 100%. Keeping it subtle (below 50%) ensures natural, believable results that retain skin texture.
Can I use these tools on my phone?
Absolutely. Some of the most popular and powerful AI retouching apps are mobile-first. FaceTune, Photoroom, Adobe Photoshop Express, and Lightroom Mobile all have sophisticated AI skin tools perfect for editing on the go.
What’s the difference between AI retouching and the old “blur” tool?
The blur tool smears everything uniformly, destroying detail. AI is selective and intelligent. It smooths uneven tone and color while actively preserving texture details like pores, fine hairs, and the natural grain of the skin. The result is clarity, not mush.
Is it “cheating” to use AI for professional work?
Not at all. Professional photographers have always used the best tools available to deliver results for their clients. Using a darkroom was once the standard; then it was Photoshop. AI is the next evolution—a more efficient tool to achieve the same artistic vision. Your creative direction is what clients pay for.
How do I avoid the “plastic skin” look?
Two tips: First, always keep texture visible when you zoom in. Second, after applying skin smoothing, often a slight increase in “Clarity” or “Texture” (5-10 points) over the entire image can help reintroduce a natural feel.
Your New Portrait Editing Reality
AI has democratized one of the most sought-after skills in photography. What was once a complex, time-consuming art form is now an accessible tool that allows you to enhance your portraits with confidence and speed.
The technology handles the tedious precision work, freeing you to focus on the emotion, connection, and story within the portrait. It allows you to polish a great shot into a flawless final image that still feels authentically human.
Ready to try it? Open your favorite photo of a friend or family member, find the “AI Enhance” or “Smooth Skin” slider, and gently move it. See the magic happen while the person you love still shines through.
What’s your biggest challenge with portrait retouching? Are you excited or hesitant to let AI handle the details? Share your thoughts in the comments below!